Review Forms are customer-facing testimonial capture forms, which are sent to your customers via SuperLinks. Each property in the Review Management Platform has its own Review Form.
This guide walks you through the steps required to set up your Review Form.
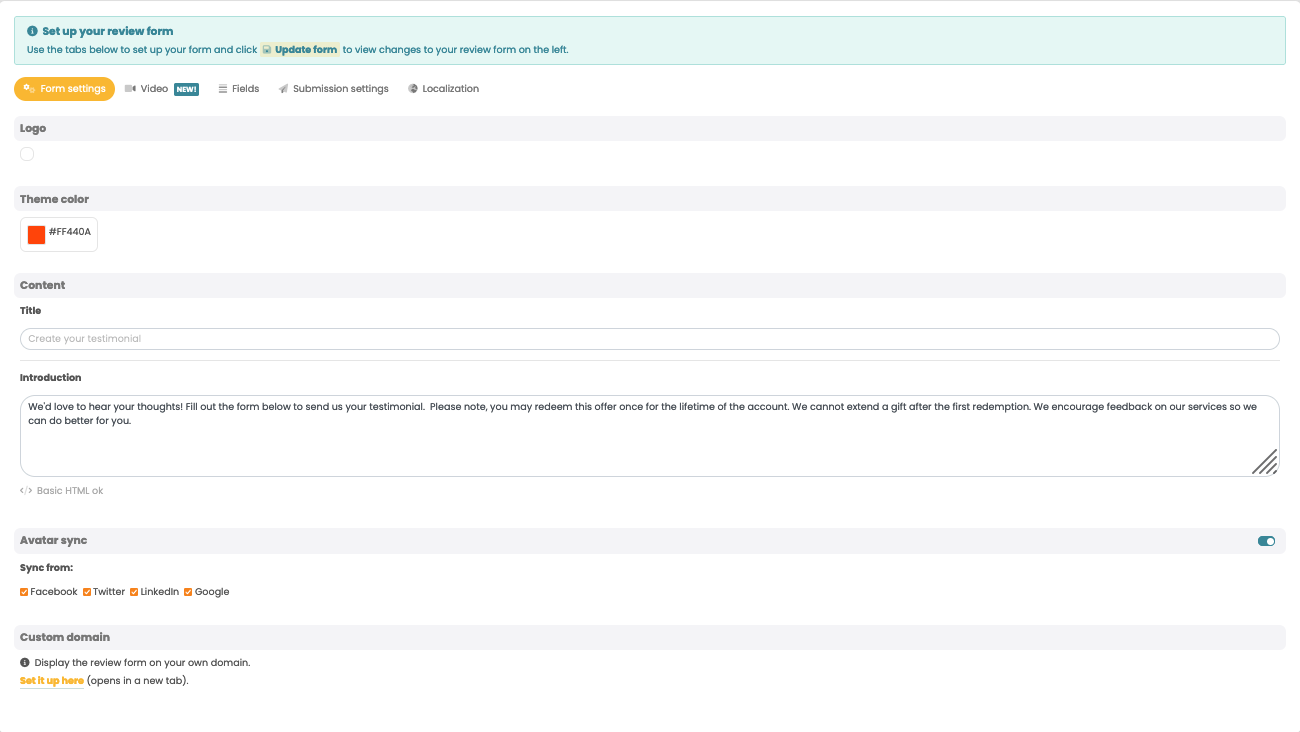
Firstly, head to the Review Forms page and select or create a form.

Step 1: Form settings
This tab allows you to create the look and feel of your Review Form, including:
— Logo
— Theme color
— Introduction text
— Avatar syncing (customers can pull through social media avatars in a few clicks)
— Lawfecta branding
— Custom domains (host the form on your own website)
Step 2: Fields
Here you can specify which data you'd like to collect from your customers as well as customize the field labels.
You can choose from:
— Avatar
— Name
— Company
— Position (job title)
— Location
— Rating (stars: 1-5)

Step 3: Submission settings
This tab allows you to choose what happens after a customer sends their testimonial. You can edit the text that's displayed, as well as the following powerful features:

— Publish to other services
You have the option to send customers to other platforms in order to post the same review. Simply turn a platform on and paste the link to your review page.
On the live form, your customers' comments are automatically copied to the clipboard and they are given instructions to post the corresponding review.
We support these platforms by default:
— Facebook Pages
— Google My Business
— Yelp
— Trustpilot
And you can add any other platform you like, using the "Add a custom service" section:

— Incentivized request
Reward your customers for leaving their testimonial by adding an incentivized request. Here you can specify the reward, be it a discount code or unique link to a reward page.
On the live form, the reward will be displayed only once the testimonial has been sent.
— Visit button
Create a button to send your users to a destination of your choice after leaving their review. A great way to drive engaged customers back to your site.
Step 4: Localization
Your Review Form can be automatically translated into any language using the "Localization" tab.
Tap "Add new", then select a language from the drop-down. Every piece of text on the Review Form is displayed along with auto-generated translations.
You can edit the translations to anything you like. Once you've finished, tap "Create localization".
Now when a user views your live Review Form, if their browser language matches the localization you've created, the form will automatically display in their language. To force a particular language, simply append "?lang=lc" where lc is the language code that represents your chosen localization. For example:
— French: ?lang=fr
— Spanish: ?lang=es
— Chinese: ?lang=zh

Finishing and viewing your Review Form
Once you're happy with your Review Form, click the green "Update form" button at the top right to save your changes. The form preview on the left hand side will be updated to the latest version of the form.
To view your live form, click "View form" — this will open your Review Form in a new tab.
Congratulations, your Review Form is complete!
